
Online Courses with CapCut’s Video Editing Features
The flexibility and accessibility of online courses have changed the face of education around the globe. But keeping students interested in an online course goes beyond great content, it requires a good amount of attention-grabbing dynamic video rather than static video that clarifies concepts.
CapCut for desktop is free of cost and thus a powerful tool for transforming course materials into professional yet captivating works, not requiring intensive training or the financial ability to pay for an outside editor. CapCut’s text-to-speech feature stands out for course creators; it allows users to add narratives without the user recording his/her own voice ideal for lesson explanations or guiding students through modules.
We shall look at how the CapCut desktop editor could further help in online courses with a step-by-step guide on creating impressive educational videos.
Why Video Quality Matters in Online Courses
Videos form the backbone of successful online courses. Complex topics can be dissected for visual learners; they motivate and make students finish the course. The CapCut desktop editor enables you to create polished and engaging content that could stand with high-end commercial platforms but is affordable.
Student Retention
Clear and well-edited videos with firm sound and pictures prevent drop-off rates by allowing students to enjoy, follow, and absorb lessons without distraction.
Distinction
These days, the market is saturated with online courses. If yours can stand out, it can gain enrollment. CapCut is here to assist.
Streamlining Content with CapCut’s AI Video Generator
CapCut’s AI video generator is a time-saver for course creators, turning text prompts—like “Intro to coding basics”—into ready-to-edit videos with visuals and transitions. This tool lets you quickly build lesson segments or intros, freeing you up to focus on teaching rather than editing.
Video Creation Simplified Populating Content: The AI video generator automates all groundwork and lays down a great draft within no time, which is an amazing thing for creating a composition of multiple lessons. Personalizing It to Your Course When the AI makes your video, personalize it to the costly editor of CapCut with your own examples or branding to fit a style for your course.
Freshening Up with the Voice Changer in CapCut
Audio is everything for captivating the student, and the CapCut voice changer helps put a fabulous twist on narration. Whether you want a warm tone to encourage a child or a lighthearted fun effect to lighten a subject, this tool can make your voice worthy of adding to the learning experience from social media.
Making Lessons Finding Memorable
The most innovative or intriguing voice could help students remember an idea—imagine a robotic tone for tech tricks or a mesmerizing tone for a mindful class.
Flexing with the Audience:
Change the voice to be appropriate for your students—for example, adult professionals or playful fun for younger kids—so that they can still connect with the material.
Making a Course Video with CapCut for Desktop
Using videos in your online course should not be very difficult. With the help of the CapCut desktop editor, it makes creating an online course very simple, since there are evident tools for helping the process. Be it a full lesson or a quick explanation, this workflow will help to develop content that will keep learners entertained and immersed in education. Here’s how to do it from setting to finished video in a smooth flow.
1. Import your video
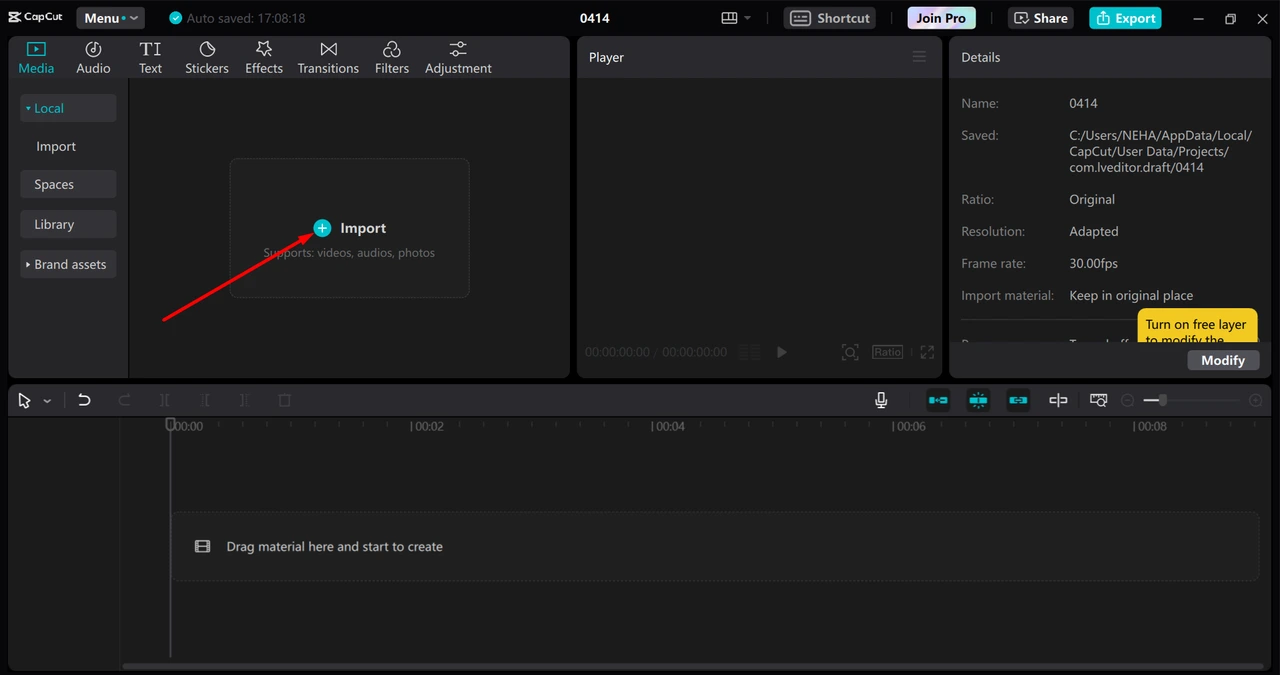
Download this desktop version from CapCut’s official website then install this version onto your computer (Windows or Mac).
Once installed, just open the app and click “Create Project” on the welcome screen to get started.
Then, import your materials by clicking at the top-left corner and choosing Import.
Drag and drop slides, screencast recordings, or music onto the timeline at the bottom.
just as you might with any other video editing software to set your sequence.
2. Customize your video
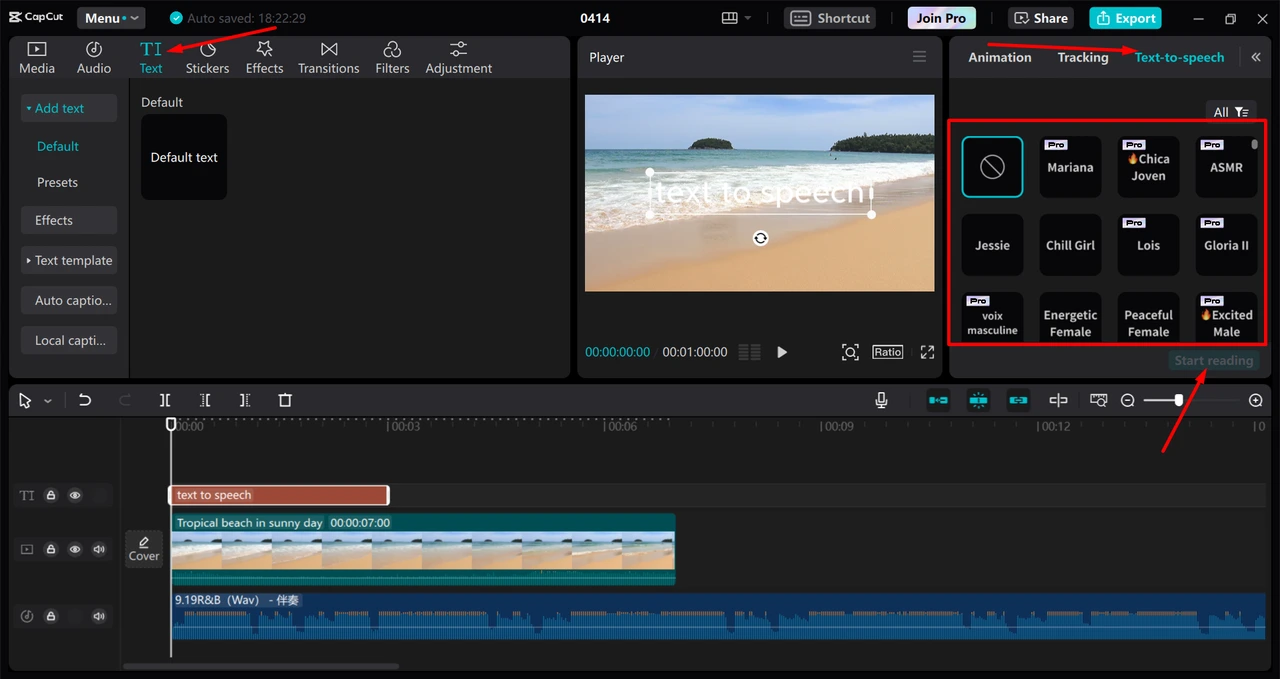
To record narration, go to the “Text” tab on the left sidebar, select “Text-to-Speech,” type a line like “Let’s dive into today’s lesson,” pick a voice, and hit “Generate.” Next, just drag the audio onto the timeline and sync it with visuals.
To get good audio, select your track on the timeline then go to the top menu, click on “Audio,” then select “Voice Changer.” Choose from the preset effects like “Warm” or “Echo,” tweak as you like, and apply them after a preview.
3. Export your video
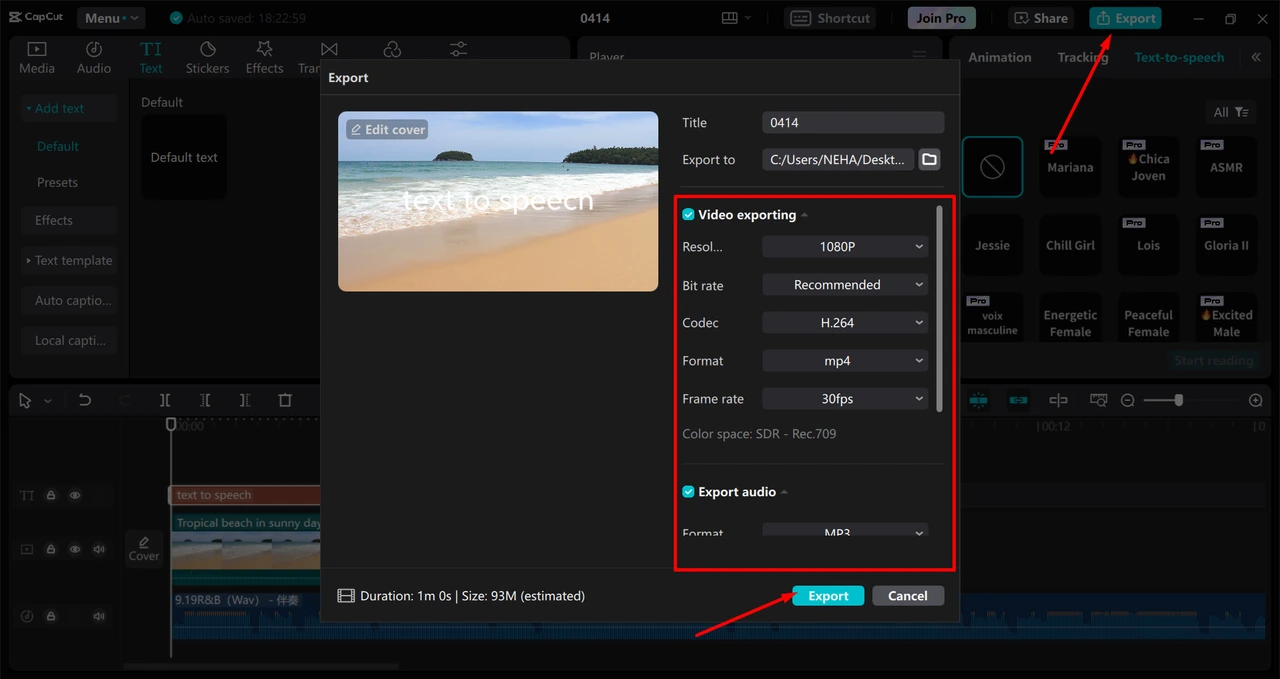
Finally, attach the last text overlay or include the highlight feature using the “Text” and “Elements” tabs. Preview it with the play button above the timeline then click “Export” in the upper-right corner and set your desired resolution, say, in 1080p, and save it for your course platform.
Tips to edit Online Courses Better with CapCut:
Divide It: Keep videos under 5-10 minutes long to hold attention; use CapCut to cut longer lessons into shorter segments.
Highlight: Text or arrows can be added to critical info that should be emphasized to the student.
Test Audio: Audio clarity narration should be heard and understood by learners.
Conclusion
The desktop editor from CapCut is a revelation of online course enhancement, packed with features such as text-to-speech, AI video generator, voice changer, and so on, worth the penny for perfect professional videos during travel. Take the above procedure, try out all this specifically for your course content, and bring it alive. Download CapCut now and advance your online teaching!